Visit us in the quaint hamlet of Myrtle Station, ON at: 9585 Baldwin St. N. (905)655-4858
(17.8km north of 401 exit 410. Look for the green house with the red roof a few doors north of the Myrtle Station railroad tracks)

Tuesday, September 10, 2019

Sirdar and I

Sirdar patterns and yarns are a longstanding tradition in our family. Created with skill and thoroughly reliable, I especially enjoy their baby and children's DK designs. DK knits up into a fabric which works perfectly indoors as well as outside under a jacket. If I stitch for only an hour an evening the garment is complete in a reasonable amount of time. Fortunately, Sirdar continues to generate an absolute plethora of patterns for every season, for everyone, for every thickness.
It was indeed a pleasure this spring to find many of them downloadable through Ravelry, beginning with this free cardigan design.The pattern works for children up to 7 years old, using Sirdar Snuggly DK. The young models on the cover are so appealing. It's a wise choice to offer.
Back in time Hayfield used to be a separate company and now continues as a part of Sirdar. This means a dazzling choice of materials for knitters. One can use classic Country Style with a touch of wool, the all acrylic Bonus DK or the ever sturdy Snuggly just to name a few.
Snuggly is a classic baby yarn with generous yardage that washes well because of the soft nylon filament mixed with the man made fibre. Over time I have found I get the recommended gauge with a 3.75, as I am a relaxed knitter, rather than the 4mm. I do use 3.25 for the ribbing
The pattern is available for download from the Sirdar website. There are other free patterns on the same page for flowers, toys and jumpers. The PDF printed perfectly for me without any adjustment to page size right from my phone.
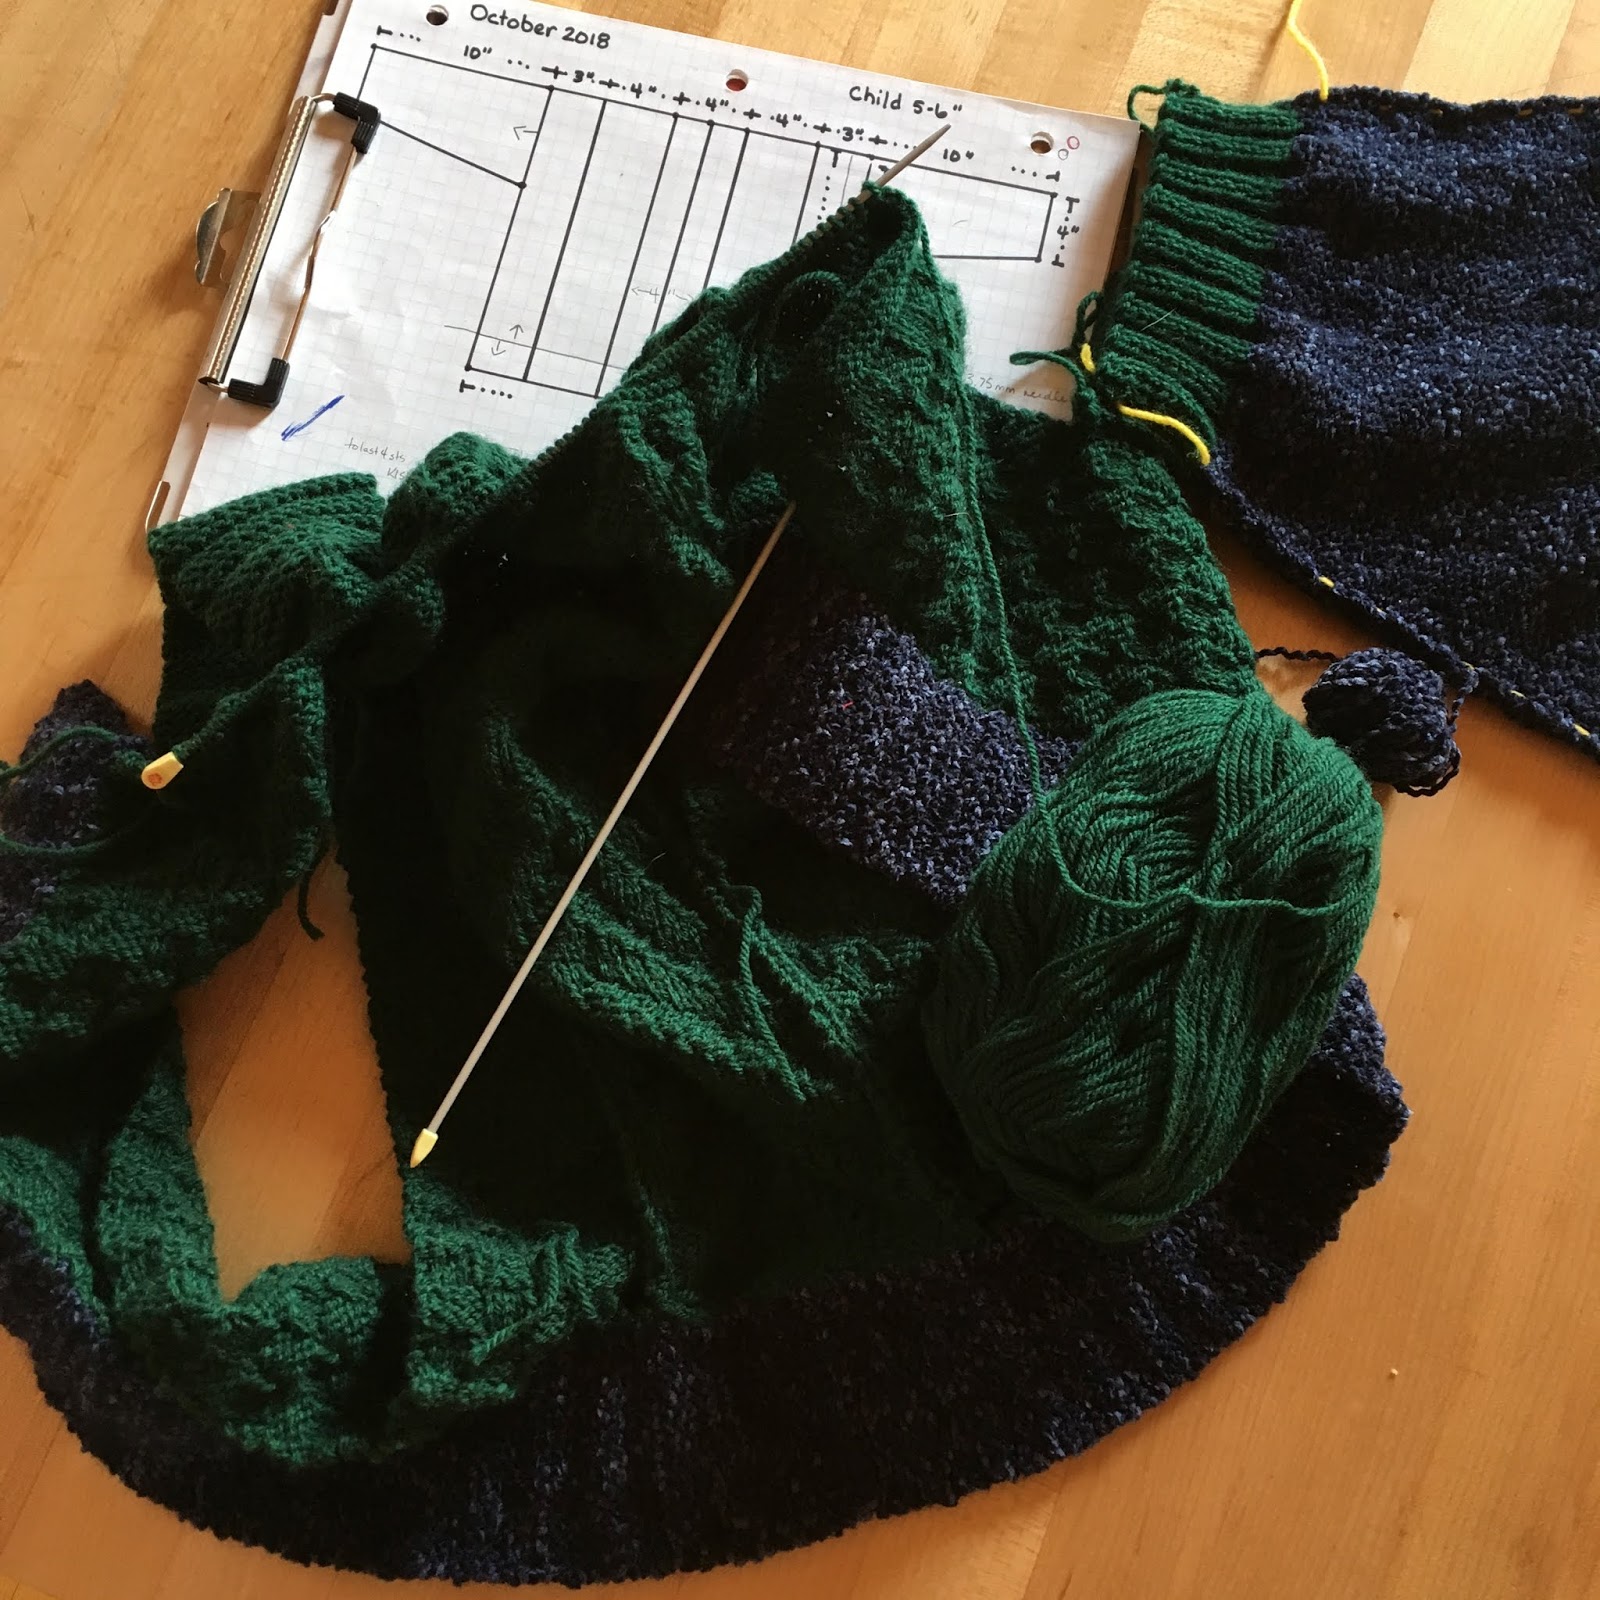
As customary with Sirdar patterns, sizes, abbreviations and yarn amounts are clearly laid out on the first page along with the schematic. 
My friend Carolyn, who is just beginning to knit again, is using this pattern after a long hiatus and has completed the body. We are now in button choosing mode. I marked the placement first by counting the rib stitches. I prefer an odd number of buttons.
It's a small cardigan, so dimes give a better sense of button position, before I make the buttonholes. I'm using the simple knit 2 together, yarn over buttonholes.
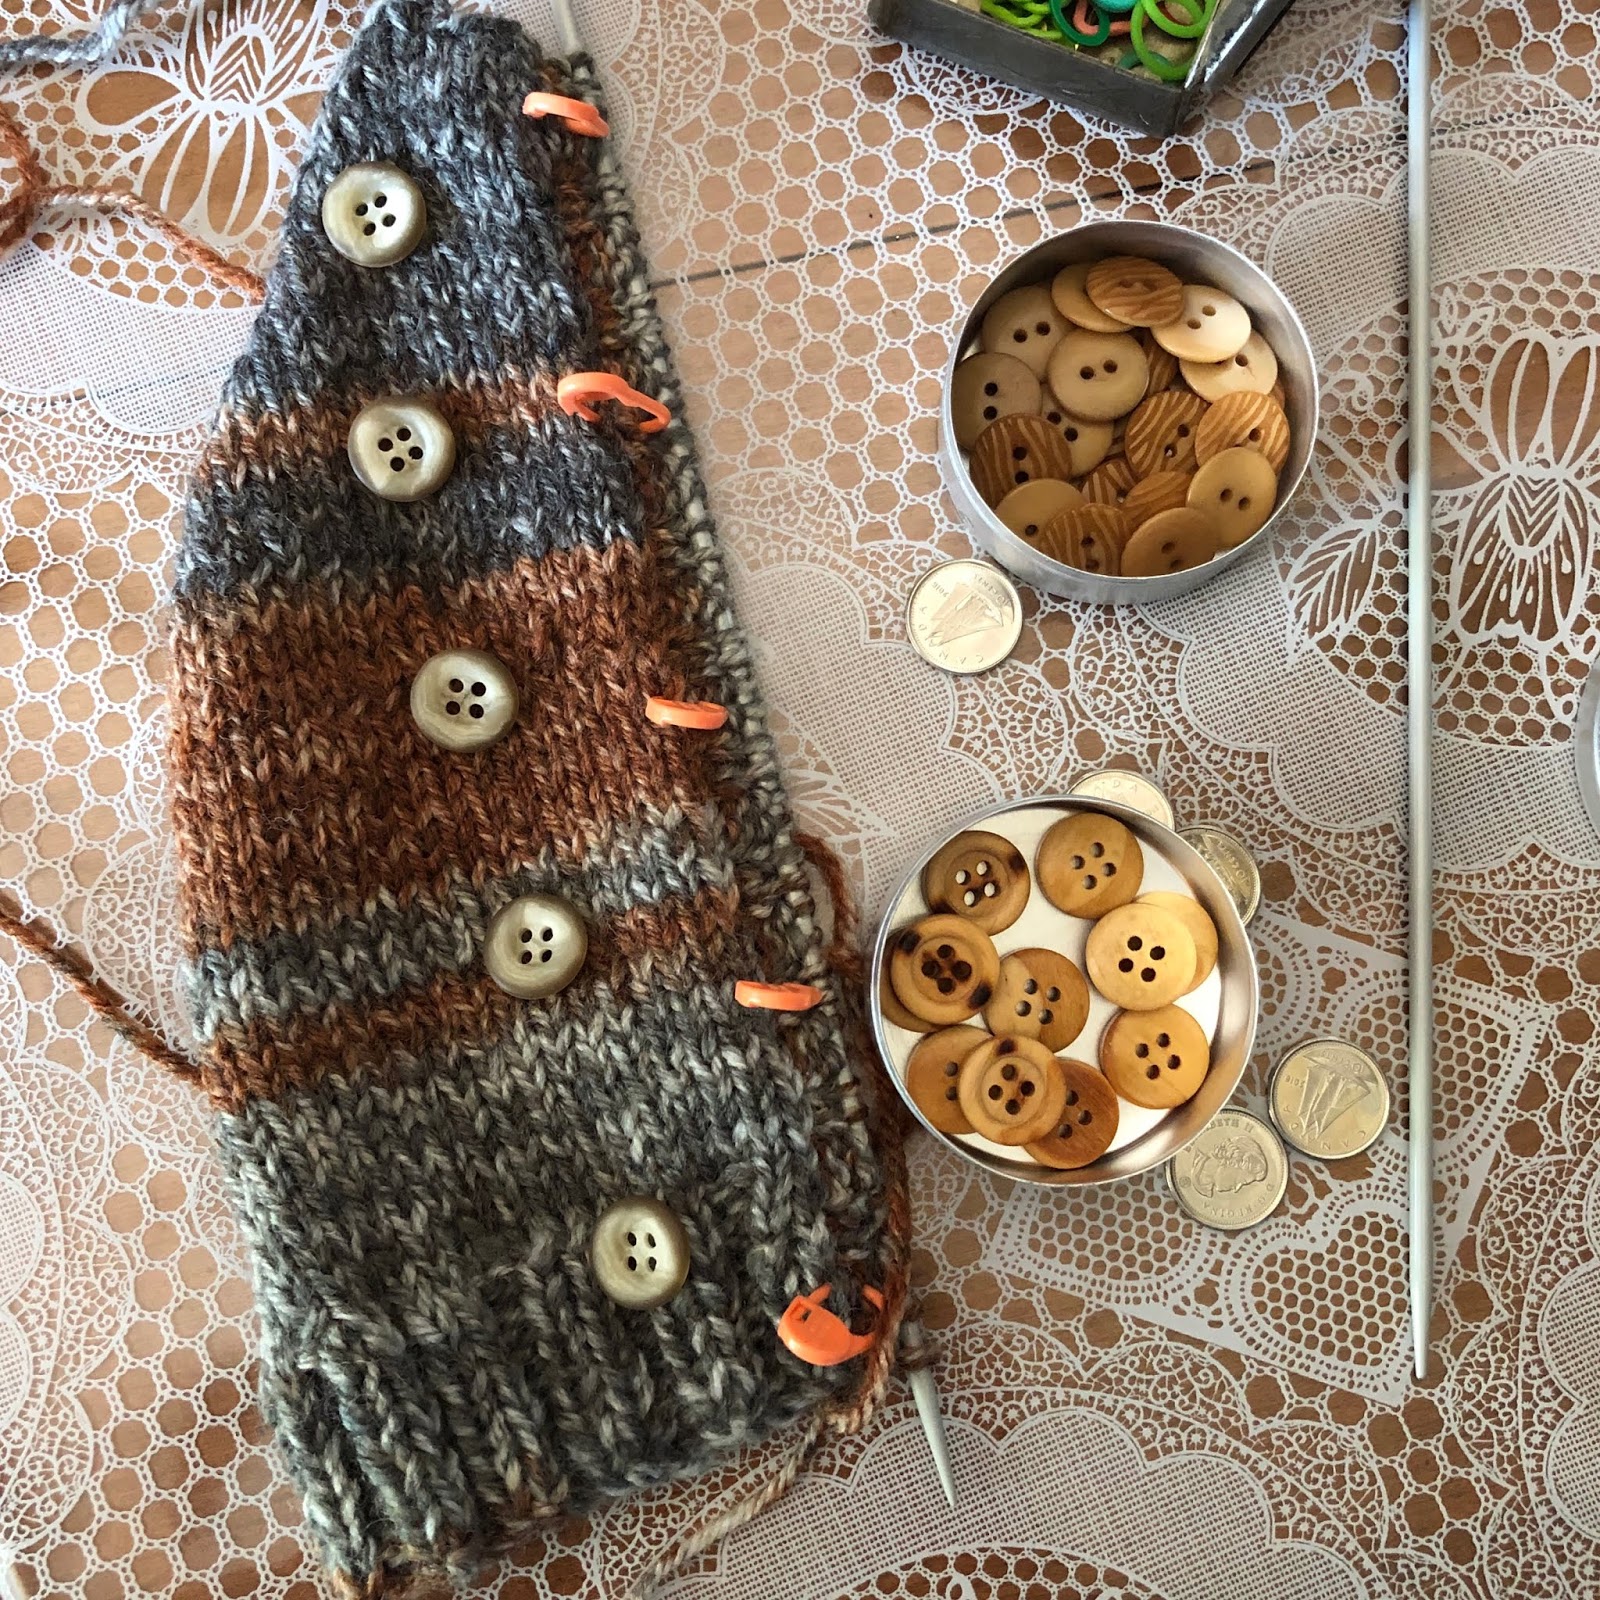
These are my choices, I think I like the wooden ones best. This cardigan will be a contribution to our church mission work. The collar will be next, then tidy the loose ends and sewing up. I hope Carolyn was only joking when she said she is going to frame it.


Friday, March 29, 2019

Sleeves for Bruce's jacket and completion is near

So now it is time to set in the sleeves, but first I will chat about how I drafted the pattern, and how it met my expectations. For a fact, I am a loose knitter, so I used a 3.75mm needle when the ball band called for a 4, and even so, my gauge is 19 stitches and -- rows to 4 inches, rather than the -- stitches and -- rows on the ball band. Never mind, I like the way the fabric feels, I think it has integrity, so I am basing my calculations on my figures.
The initial draft is for a classic dropped shoulder, so to accommodate the shaping created by the side panels it will change to a "modified drop shoulder" a sort of squared set in sleeve. If you want more depth and discussion of drafting sleeve types I highly recommend this most excellent series of Knitty magazine articles by Jenna Wilson
I like to use 4 or 5 squares to the inch graph paper, 1 square = 1 inch. I really helps me visualize proportions. First I put dots (sometimes in pencil first) at the desired measurement points.
The connect the dots and  add the script detail. I am quite fond of the "katcha katcha" row counter  from Clover, so I make a row list for decreases, and the stitch count after each step.  I also prefer to work the shaping 1 or 2 stitches in from the edge, with appropriate right and left leaning decreases.
Knitting the sleeves from the top down is a valuable strategy. You can amend the shaping, augment the lower part with a second and or third yarn, and deepen the cuff to achieve the desired length. Sometimes I knit two sleeves at once so they match until the yarn runs out. All in all, a very helpful practice.
To finish off, I dug out some 2.5mm straight needles and really enjoyed knitting where the working point is not much different in diameter to the stem of the needle. These vintage needles remind me of the "stratnoid" needles my dear Aunt Joan used to work with.
Sleeves basted right side together, ready for the steam blocking, under a tea towel of course, because both yarns contain nylon, which goes quite unpleasantly crispy if you touch with the sole of an iron.
Here you see how uneven the body is before pinning out and blocking, but with many of the yarn ends tucked away.
The body pinned out, and sleeve opening measurement double checked.
The sleeve matches the measurement I had planned on paper, without much coaxing.
Ready to block
Sleeves in using a crochet slip stitch, cuffs get the mattress stitch, I love this Youtube video from Pierrot Yarns in Japan. What is the sound of one tapestry needle sewing? Next, Bruce will let me know about if he wishes this chunky pewter clasp from Norway.

Saturday, March 2, 2019

Bruce's jacket, Collar time

Over the years, many times, people have told me about how their mothers sewed knitted pieces together, without a seam edge showing on the inside. I believe the best way to accomplish this is by using what is known to sewists as the  oversewing or whip stitch.
The other thing I have heard many times is the practice of adding an edge stitch, often slipped every other row, in knit (garter stitch). I use this is sock making myself, making the picking up for the instep clear and easy.
Women at home have a long history of sewing and making for themselves and their families. To me, this means a deep practice in handwork was normal. Richard Rutt has a great deal to say about the history of sock knitting, as well as knitting in general. I believe people constantly made socks, both for the family and for sale. It could be that sock making practices migrated to garment making. Creating a sweater is a special occasion, and extra expense of time and material. Perhaps a new baby or an evening out. You would also want to make a fine fabric if you were layering, as in a twinset, a suit vest or a pullover.
A high level of skill fits perfectly with the flat sweater seam. It would be carefully worked, on a garment made out of typically fine yarn. Patterns from the 30's 40's and 50's were made with fine 3 ply at a gauge of 32 stitches to 4 inches on a 2.75 mm needle. Today's common worsted weight or even DK was the considered a heavy weight for an outdoor garments or quick projects.
James Norbury's book is a  faithful reprint of vintage patterns and easily available at Indigo
Most of the garments are worked in fine yarn. It is interesting that Mr. Norbury is an advocate of the back stitch, rather than the whip stitch. Bernadette Banner, a historical sewist makes the distinction of seams that will be stressed, as in the shoulder area, verses seams that only need to join fabric as in a skirt side seam. Alabama Chanin, a modern hand sewer uses Coats Button and Craft, a super strong thread doubled.
Even if you were a super fast knitter it would take many, many evenings of precious spare time to create a jumper. You also had the responsibility of making for a large family, thus putting the pieces together would be a most satisfying and brief event compared to the time spent knitting.
Oversewing stitch is common in English Paper Piecing Patchwork. The pieces are butted up against each other, joined, and lie flat when stitched together.
 Another factor could be knitters using mostly wool before WW2. A Fibre which can be safely steamed and pressed, making a seam even more flat and smooth.
Back to the collar on Bruce's jacket. Before I permanently stitch it into place, I first baste the strip in place. Right sides together, beginning at the centre back, and working towards the hem. Sewing from the centre towards an edge is a common practice when dressmaking and quilting.
I left half an inch at the bottom to allow for the hem I will be adding to the body later. The picture below is where I stitched it in place, for clarity, with white yarn.
I really stitched using the main bottle green yarn.
The seam is quite flat, and will be even more so after a light and careful steam (because of the the acrylic content) once the jacket is complete.

Friday, February 15, 2019

Knit Club, February 2019, the most excellent stretchy bind off

I have made several samples for the knit club meeting in February. They are in DK yarn, 42 stitches wide and 42 rows long, with a simple stripe pattern. I have 4 goals for using them; tidy up loose ends, the most stretchy bind off, mattress stitch and back stitch seaming.
The main tools for this is a number13 tapestry needle, fairly large and with a blunt point. The plastic version works perfectly for this technique.
In my system of sweater making, the first step once the work is off the needles is to measure the piece and confirm it is the measurement I expected. Then I tidy up loose ends. Darning them into the inside of the fabric, horizontally, sometimes diagonally and sometimes vertically through the back of the stitches.
Then I block, and finally sew up and add the bands. This is often the place for a stretchy bind off, aka backstitching through the loops.
Another appropriate place for the stretchy bind is a sideways knit scarf or garment. Gravity affects sideways knits and often, what seems loose enough in a cast off, over time restricts the drape of the piece. In our sample, we are doing it after the tidy. I think because I enjoy sewing as well as needlework, my habit is to work with garment pieces that are clean finished and pressed. I have noticed this also in Japanese garment making, which I have long admired. This is one of my newer reference manuals, which I purchased from The Needle Arts Bookshop in Toronto. The attention to detail fascinates me, my zen of knitting.
After I have knit the final row for example,  I knit a few rows in a sturdy contrast coloured waste yarn which matches the weight of the main yarn. I recently wrote about this method when I finished a cowl in Trinity Stitch.
One can certainly do this bind off from a knitting needle, however I have found a few rows of contrast waste knitting is a great benefit to a smooth and even tension and adds to the enjoyment of the process. Below is another photo from a vintage book in my stash. Notice the stitch being worked from right to left again.
I cut the bind off yarn 5 times the width of the piece. I have noticed a recommendation for 3 to 4 times the width, but 5 times feels much safer to me. For my sample I am using a yellow contrast yarn, but were this a garment it would be the same yarn continued from the final row of the garment.
Working from left to right, I poke the threaded needle through the fabric just below the starting point, this is to control the yarn end from jumping into the way, especially during the static filled days of winter.
Start by poking through down the second stitch and then up through the first stitch, then up the 3rd stitch and down through the second stitch and so on. You can gently stretch the knitting to see the actual stitches better. I always look for the rounded shape of the stitch purl side.
I like to have the yarn below the stitch, and it forms a nice lapped effect on the purl side. You could also have it above, it just matters that you are consistent.
Make the stitches a nice relaxed even tension. The main fabric should stay the same width, i.e not pucker or stretch.
The reverse (right) side will look like little purl bumps.
 Undo the waste yarn and admire this most stretchy and beautiful bind off.
Practice makes progress!

Friday, January 11, 2019

Bruce's Jacket is looking good.

Backstitching the main panels is now complete and for sure, always knitting the edge stitches to create a clear selvage was very helpful as endorsed by James Norbury.
I own this funky book from the 80's called Wild Knitting by Angela Jeffs . There are so many of things to appreciate about this old chestnut, the freshness of the creativity, the joy and fun in the projects and for me especially, the use of mohair, one of my most favourite yarns.
I especially appreciate the stitch dictionary at the back and the drawings so beautifully rendered. The selection of stitches all solid and enjoyable picks.

I am using the wager welt for the collar and side panels of the jacket.
How can you resist a stitch also called puzzle stitch, dispute stitch and all fools welt.
To determine the measurement of the side panels in relationship to the sleeves I lay the parts on top of Bruce's fleece jacket.
It looks pretty good to me. The next step is to knit the sleeves. I am going to start from the top and decrease towards the cuff. The top of the sleeve will have a straight area that should sew neatly into the side panel.

Thursday, January 3, 2019

Seams Incredible: The Back Stitch

We discussed seaming Bruce's jacket last night at the knit guild. Sewing up is actually one of the primary reasons we are making the jacket this season. The modular format (or knitted strips) create lots of opportunity for seaming.
Like a reverse New Year countdown, I made top ten list, are we ready?
  1. Back stitch
  2. Mattress stitch
  3. Crochet slip stitch
  4. Three needle bind off
  5. Whip stitch
  6. Grafting
  7. Picking up and knitting
  8. I cord
  9. Sewing Machine
  10. Knitting in the round (no sew)
For this post and Bruce's jacket I am using the back stitch for the lengthwise body pieces and a size 18 tapestry needle. This James Norbury's preferred method
It makes a very strong seam, is the devil to unpick and I think it works well when the knitter has the practice of knitting and slipping edge stitches to create a clear selvage.
I like a smaller needle for back stitch because it pierces the edge better and the blunt point avoids splitting the yarn and resulting snagging. The larger needle is a size 13, my preference for mattress stitch.
I am ok with a visible seam on the reverse side, though I understand many knitters prefer a smoother look. I will investigate this possibility later in the new year. I imagine it similar to flatlocking, the kind of seam common on sportswear.
I like the Clover stitch holders when I use the 3 needle bind off as they act like a knitting needle. You could alternatively use double pointed needles.
When the shoulders are complete, the stitch patterns flows smoothly over the shoulder. Notice the extra yarn I leave connected after I have knitted the parts. I leave a 4 times the width of the knitting length on each piece, so I have more options for which yarn I will eventually use to cast off. For me, this is one of the few places I leave a length of yarn from the knitted piece for sewing up. Mostly I prefer to sew up seams with fresh yarn.
My final tip for back stitch is to consider using a thinner yarn for sewing. For example a DK yarn with a chunky. Certainly with a soft unspun yarn like Lopi a yarn with twist and ply is necessary.